Saturday 31 December 2016

Computer Experiment: Multiple Exposure -

Computer Experiment: Multiple Exposure - 


Original Image:


Final Image:


Technique - 


I began by opening the original image and unlocking the layer.


I then moved up to 'File' and selected 'New...'.


I changed the perimeters of the file to fit my idea.


This is the file and its size.


As I wanted a black background I decided to hover over the 'Brush Tool' (B) and select the first from the list. 


Changing the brush size and colour to black I started painting. 


This is the file once I had painted it black.


I then dragged a copy of the original image over to the new file. Once there I moved up to the 'Edit' drop down menu and chose 'Transform' followed by 'Rotate 90 Clockwise'. 


Once more I then headed up to 'Edit', then 'Transform' and 'Scale'. 


I repeated the process of dragging another of the same photographs over.


I repeated the process but changed it to 'Rotate 90 Counter Clockwise'. 


Once more, I repeated the scaling process.


This is the two images for the base layer once mirror imaged.


I dragged one final layer over that I did not scale or rotate and overlaid it. I then reduced the opacity of the layer so that the beneath layers would show through. This is the final outcome. 

Friday 30 December 2016

Computer Experiment: Collage -

Computer Experiment: Collage - 

Original Image:


Final Image:


Technique - 


I began by moving up to the 'File' drop down menu and selecting 'New...' (Cmd, N). 


I changed the parameters of the document to fit what I estimated the final image size would be; the easiest option is to choose 'International Paper' if unsure and simply crop later. 


This is the base layer that I created as seen above. 


Next I wanted to open the file that I would be using the image from. To do this I went back to 'File' and selected 'Open' (Cmd, O). 


Having found my file I unlocked it so that I could edit the image. 


Hovering over the 'Quick Selection Tool' (W) and zooming in (Cmd +) I selected the first option. 


Changing the tool size I selected the subject.


I then dragged the selection over to the file that I created. The scale is off and needed to be fixed.


To fix the scaling issue I moved up to 'Edit', 'Transform' and then 'Scale'. 


Once I had adapted the scale I right clicked on the layer and selected 'Duplicate Layer...'.  


I renamed the duplicated layer so that it would not get confusing when continuing with the editing process. 


Once duplicating enough files I positioned them and reduced the opacity gradually on each layer by 10%. This is the final image. 

Thursday 29 December 2016

Computer Experiment: Photomontage -

Computer Experiment: Photomontage - 


Original Image:


Final Image:


Technique - 


I began by opening the file and unlocking the layer. 


I repeated the first step but instead opened the second file.


To adjust the framing of the secondary layer image I hovered over the 'Crop Tool' (C) and selected the first of the list and began cropping.


Moving down the 'Create New Fill or Adjustment Layer' I then selected the 'Black and White...' option.


I did not deem it necessary to change the pre-chosen values as I was going to be adjusting the brightness and contrast afterwards anyway.


Once again returning to the 'Create New Fill or Adjustment Layer' tool I chose the 'Brightness/Contrast...' option.


Using the sliding bar I adjusted the values until the image appeared how I wanted it to. For this particular image I increased the 'Contrast' value by 20.


I then dragged the secondary file over the base layer image. 


Heading up to the 'Edit' drop down menu I selected the 'Transform' option followed by 'Scale' to amend the image ratio. I zoomed out (Cmd -) to see the outline when I was changing the scale of the image whilst holding the shift button to ensure there would be no distortion. 


Once the image was scaled I aligned it with the base layer until I was satisfied with its position. 


This is the finished image that demonstrated the John Stezaker inspired skill whilst using Photoshop editing software to create a computer experiment. 

Wednesday 28 December 2016

Print Technique: Overlay -

Print Technique: Overlay - 


Original Image:


Final Image:


Technique - 


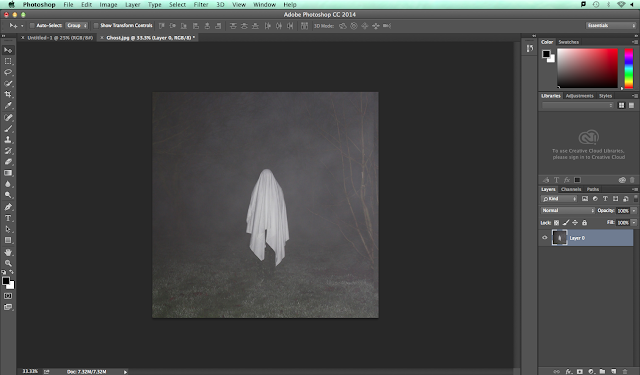
I began by unlocking the layer. 


I then moved over the 'File' drop down menu and selected 'New...' to create a secondary document. 


Although the A4 sizing was not necessary I decided to use it out of familiarity. 


I then went over to the 'Quick Selection Tool' (W) where I outlined the subject from the photograph. 


This is the fully selected subject. 


Afterwards, I started to drag the subject across to my second, blank, document where I planned on editing the small selection. 


I repeated the process several times to ensure that I had enough subjects to drag over to the initial file once edited and ready. 


I dragged over one of the copied ghosts, still at its original opacity, and layered on top of my original image so that other ghosts that I wanted to place behind the subject would supposedly sit behind the ghost of the original image. 


I then returned to my second document where I began drastically reducing the opacity of the subjects. The opacity was reduced to 30 for this particular ghost. 


I once again dragged the ghost over to the original base file and adjusted the layers so that it fitted between 'Layer 0' and 'Layer 1' which was the fully visible duplicate of the original ghost. 


Once more I went back to the second file and reduced the opacity further, now to the value of 20. 


I repeated the process of dragging it over and placing it behind all of the prior layers to make the image appear more realistic. This is the final image and whilst it is not a traditional overlay such as the bokeh effect it fitted more so with my aesthetic when experimenting with this idea.